Right-click to "Shrink Video" on Mac
Right-click to “Shrink Video” on Mac
I frequently upload screen recordings on my work in progress to our GitHub issues / PRs, but often hit the max file size of 10mb when demonstrating complicated features. I tried a few solutions including the built in “Encode Selected Video Files” which uses Quicktime, but that reduced the resolution of the video and I knew there was a better solution.
There was! ffmpeg is a super powerful CLI that allows extremely flexible video processing. I was able to run this command in the terminal ffmpeg -i ./path/to/my/bigvideo.mp4 ./path/to/my/shrunkenVideo.mp4 and it would shrink it nicely.
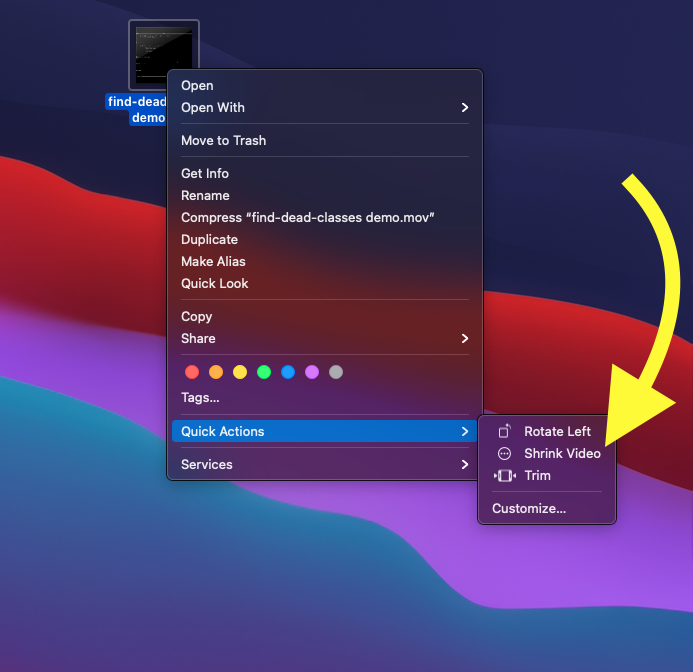
However, I personally hate switching contexts between GUI stuff (screen recordings, browser based tools, etc) and CLI stuff (like ffmpeg). I wanted to be able to simply right-click on the video file in question on my desktop and click “Shrink Video”.
Enter Automator Quick Actions! Here’s how I configured my right-click “Shrink Video” option:
- Open Automator from your Applications
- Select the gear icon “Quick Action” and click “Choose”
- Scroll down the list and drag “Run Shell Script” (with a little terminal icon) onto the right-hand “workflow” box
- Make the phrase say: “Workflow receives current
movie filesinFinder.app” - Inside the “Run Shell Script” box, select “Pass Input:
as arguments” - Paste this script in the text box:
export PATH=/usr/local/bin:$PATH
for f in "$@"
do
	cd ~/Desktop
	ffmpeg -i "$f" "$f"-shrunk.mp4
doneCMD-Sto save; I used the quick action name “Shrink Video”- Find a video file, right-click on it, and the new Option should appear under “Quick Actions” and/or “Services”.
Next step: figure out the flags in ffmpeg to limit the output size to 10mb, compressing the original file as much as necessary to make it fit.