Connecting Google Cal API and Django
Connecting Google Cal API and Django
This post was written back in the days where Heroku provided free hosting; do not expect any example projects or links to Heroku to work.
Some tricky configuration is required, and the existing Python-specific documentation is sparse and buggy (or simply not written for a production setting). My eventual solution involves using a Google Cloud Platform service account and a custom Heroku buildpack
The Problem
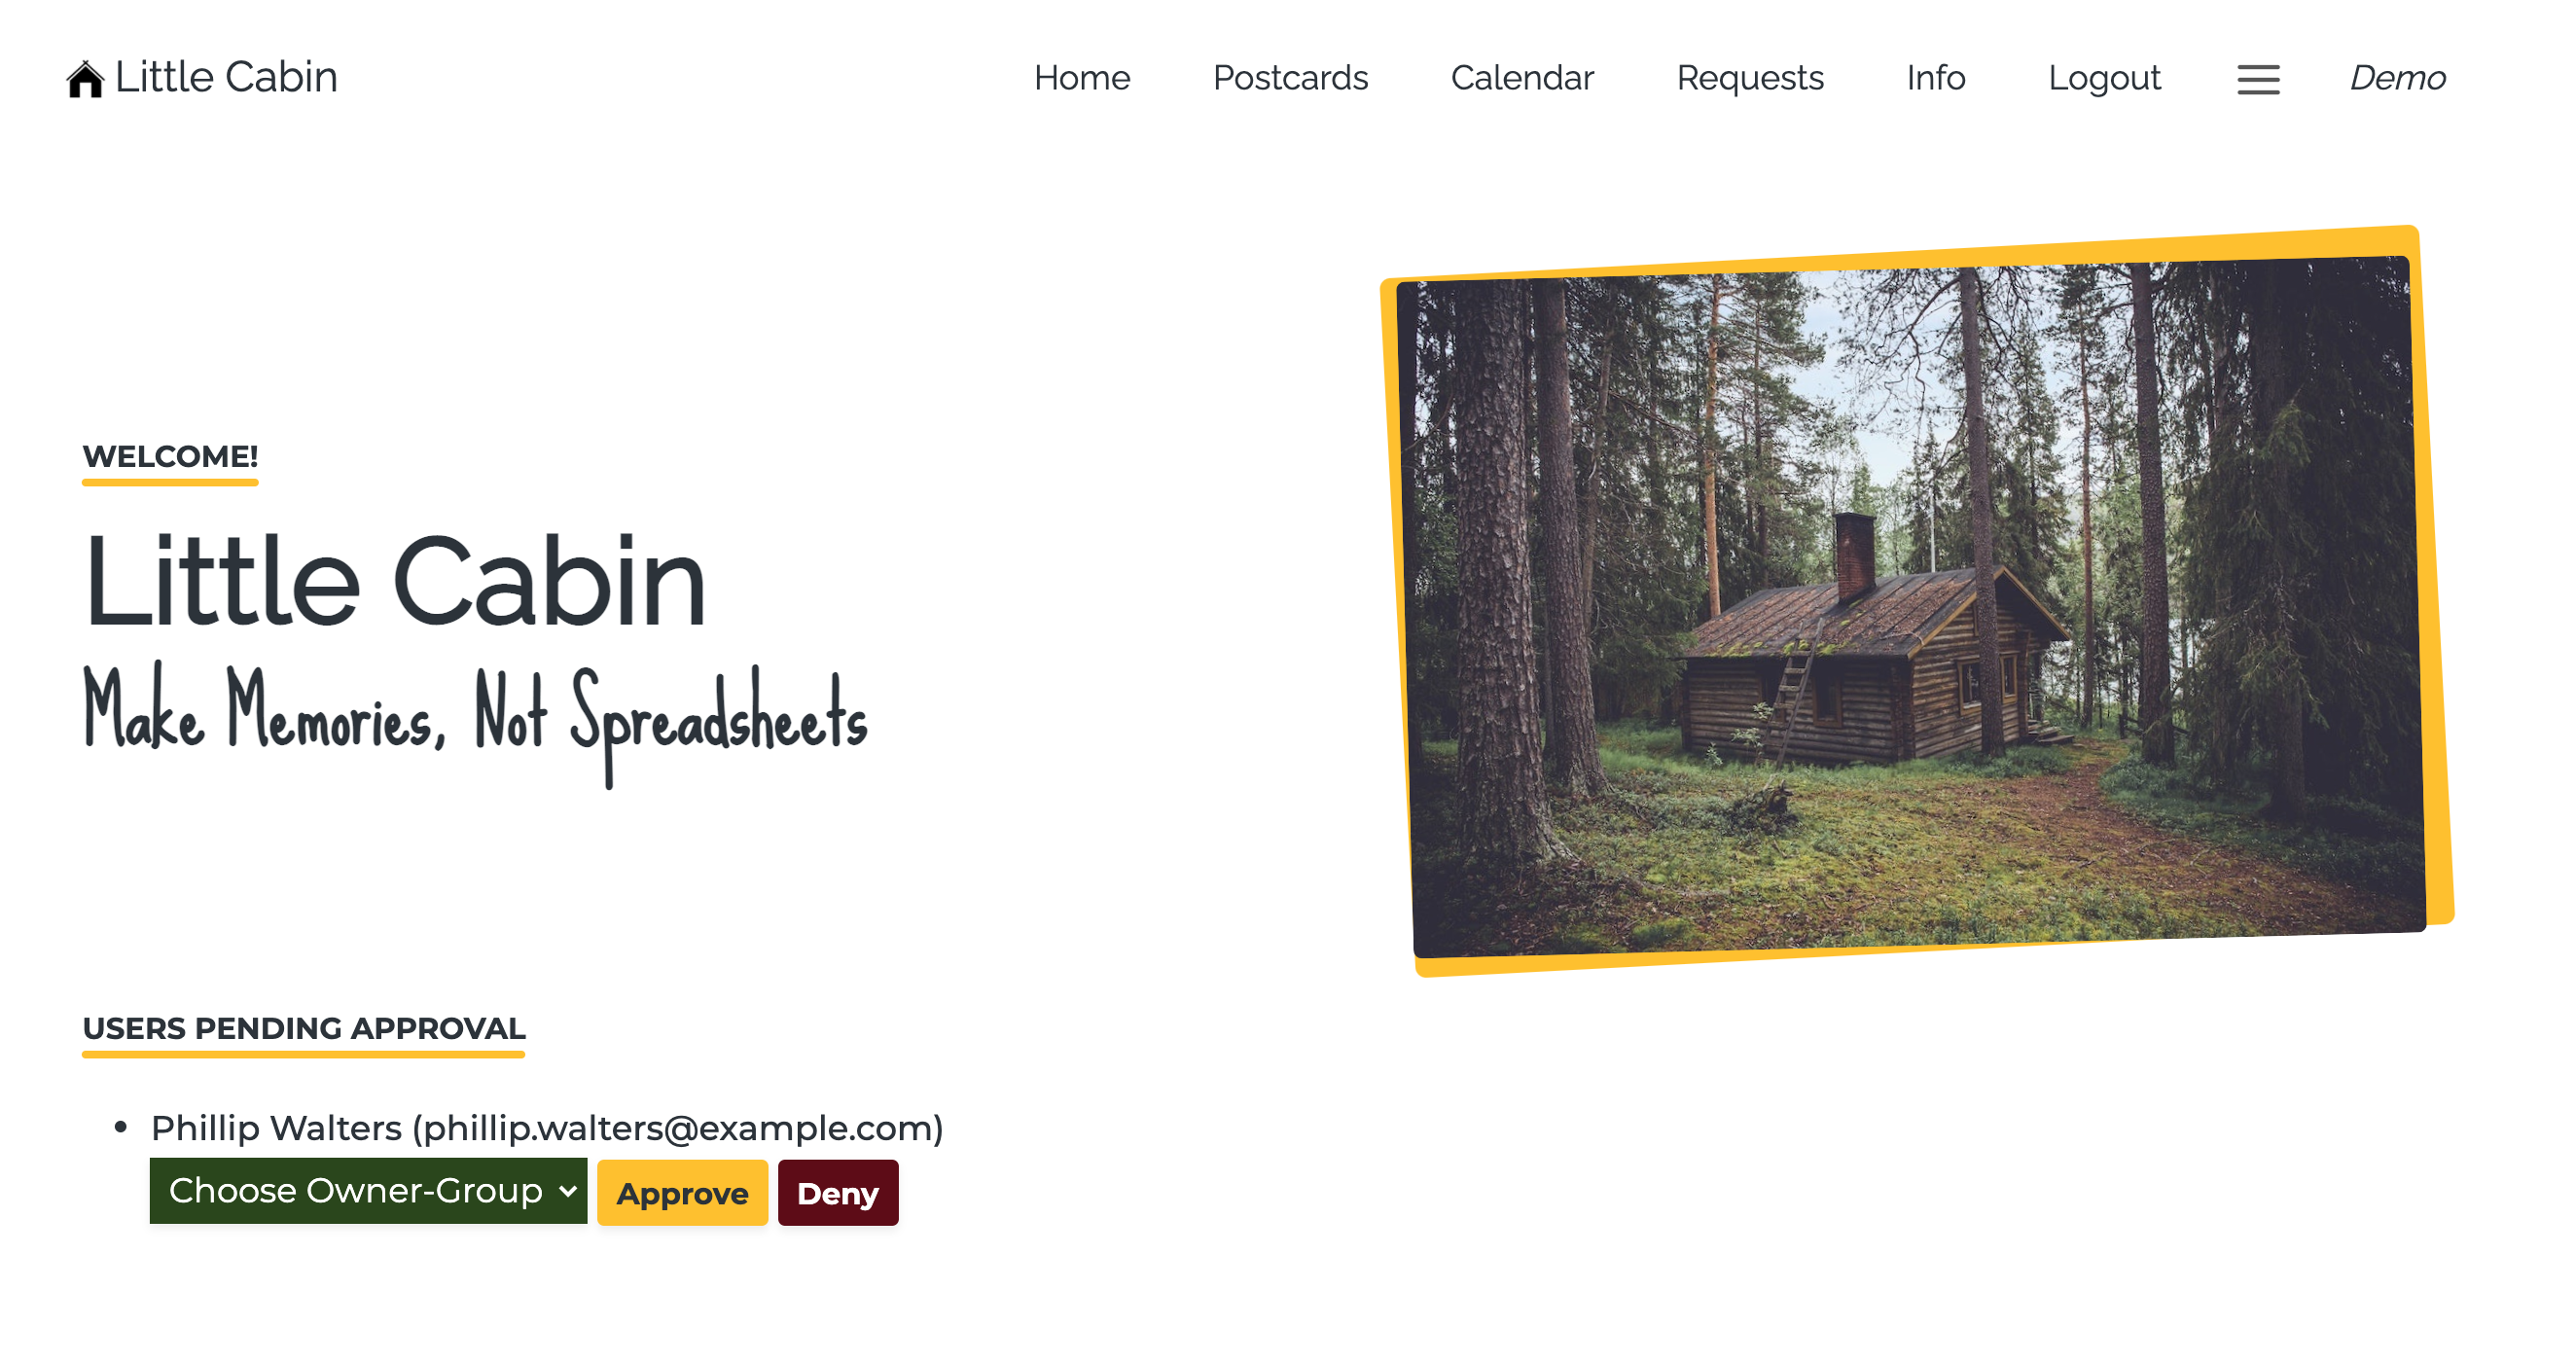
Little Cabin (my final project for my recently completed General Assembly bootcamp), provides tools for extended families to securely share their vacation property’s logistics and memories. One key feature is allowing the in-app scheduling to sync with a Google Calendar, and though I assumed it would be a simple matter of hooking up to the Google Calendar API, it was by far the most difficult problem to solve.
The Project Setup
To get myself started, I’ve followed along with my two previous blog posts:
I have also created a blog example repo on my GitHub that includes all of the steps in this entire tutorial, so feel free to clone that repo and have a look at the code. You’ll still need to do a lot of person configuration to get it working, including creating your own service account, google calendar, Heroku project, .env files and Heroku config vars, etc.
Calendar Access Module
We will start by creating a new module (just a separate .py file) to contain all of the Calendar API access methods. Python automatically exports, but you must explicitly import them into any code that needs access.
In your main_app/ folder, create a file called calendar_API.py. In that blank file:
touch main_app/calendar_API.py- then in VSCode, add the following to the blank file:
def test_calendar():
	print("RUNNING TEST_CALENDAR()")
	test_event1 = {"start": {"date": "2022-01-01"}, "end": {"date": "2022-01-07"}, "summary":"test event 1"}
	test_event2 = {"start": {"date": "2022-02-01"}, "end": {"date": "2022-02-07"}, "summary":"test event 2"}
	events = [test_event1, test_event2]

	return events
Add Route to URLs
In VSCode, open main_app/urls.py and add the following the following item to the urlpatterns[] array below the existing “home” route. This will give us two pages in total, our “Home” and our “Demo” which will demonstrate the connection to Google Calendar API
path('demo/', views.demo, name='demo'),
Add To Views
In your views.py, import the module method at the top of the file using:
from .calendar_API import test_calendar
Now add a second method which will display the demo template (later on we’ll fill in the code that actually does some work)
def demo(request):
    results = test_calendar()
    context = {"results": results}
    return render(request, 'demo.html', context)
Add To Templates
Create the html template that will serve as the HTML for eventually displaying the fetched results from the API:
touch main_app/templates/demo.html
Add the following to to the blank demo.html file in VSCode:
<!DOCTYPE html>
<html>
  <head> </head>
  <body>
    <h1>Demo</h1>
    <ul>
      {% for result in results %}
      <li>{{result.start.date}}{% if result.end.date %}-{% endif%}{{result.end.date}}: {{result.summary}}</li>
      {% endfor %}
    </ul>
  </body>
</html>
Now, edit your home.html to include a link to this new demo.html. Add the following line after the <h1>Home</h1> line:
<a href="{% url 'demo' %}">Connect to Google Calendar</a>
Install Dependencies
In your terminal, run the following commands to install needed packages and save those as project dependencies:
pip install --upgrade google-api-python-client google-auth-httplib2 google-auth-oauthlibpip3 freeze > requirements.txt
TEST IT!
Let’s make sure the plumbing is working before we add more logical complexity!
In your terminal, start the local server (make sure you’re in your activated env):
python3 manage.py runserver
In your browser
- Visit localhost:8000
- Click on the “Connect to Google Calendar” link
- Confirm the headline “Demo” is displayed
Setting up Calendar Access
These instructions draw heavily on this amazing Stack Overflow answer
Register for Google Service Account
- Follow Google’s directions to setup the new credentials here: developers.google.com
- You can skip the section entitled: “Delegating domain-wide authority to the service account”
- Save the credentials file somewhere memorable; you’ll be using these locally and later when setting up Heroku config vars
Configure a Test Calendar
- View your Google Calendar
- In the sidebar will be a list of your calendars; click the ”+” button and select “Create New Calendar” from the dropdown
- Fill in a name “Example”, and click the “Create Calendar” button
- Hover over this newly created calendar back in the sidebar, and click the three vertical dots, and select “Settings and Sharing” from the dropdown
- Scroll down to “share with specific people”
- Add your newly created service account email address (it will be “client_email” in your saved credentials file)
- Scroll down to “Integrate Calendar” and copy the Calendar ID string, then paste it somewhere safe as you’ll need it again soon
Manipulate Calendar from Local Django App
Setup Local Config Vars
- Open your local environmental variables file; in this setup it’s
example/.env. - Add the following:
# Google API
CAL_ID={{{THE CAL ID YOU COPY-PASTED FROM YOUR GOOGLE CALENDAR SETTINGS PAGE}}}
Create Your Local Credentials File
touch google-credentials.json- Copy paste the entire JSON object from your downloaded credentials file into this newly created .json file. As an example, mine looks like this:
{
"type": "service_account",
"project_id": "example",
"private_key_id": "BLAHBALH",
"private_key": "-----BEGIN PRIVATE KEY-----\nSUUUUUUPER------LONG-------STRING\n-----END PRIVATE KEY-----\n",
"client_email": "USERNAME@EXAMPLE.iam.gserviceaccount.com",
"client_id": "1234567890987654321",
"auth_uri": "https://accounts.google.com/o/oauth2/auth",
"token_uri": "https://oauth2.googleapis.com/token",
"auth_provider_x509_cert_url": "https://www.googleapis.com/oauth2/v1/certs",
"client_x509_cert_url": "https://www.googleapis.com/robot/v1/metadata/x509/username%40example.iam.gserviceaccount.com"
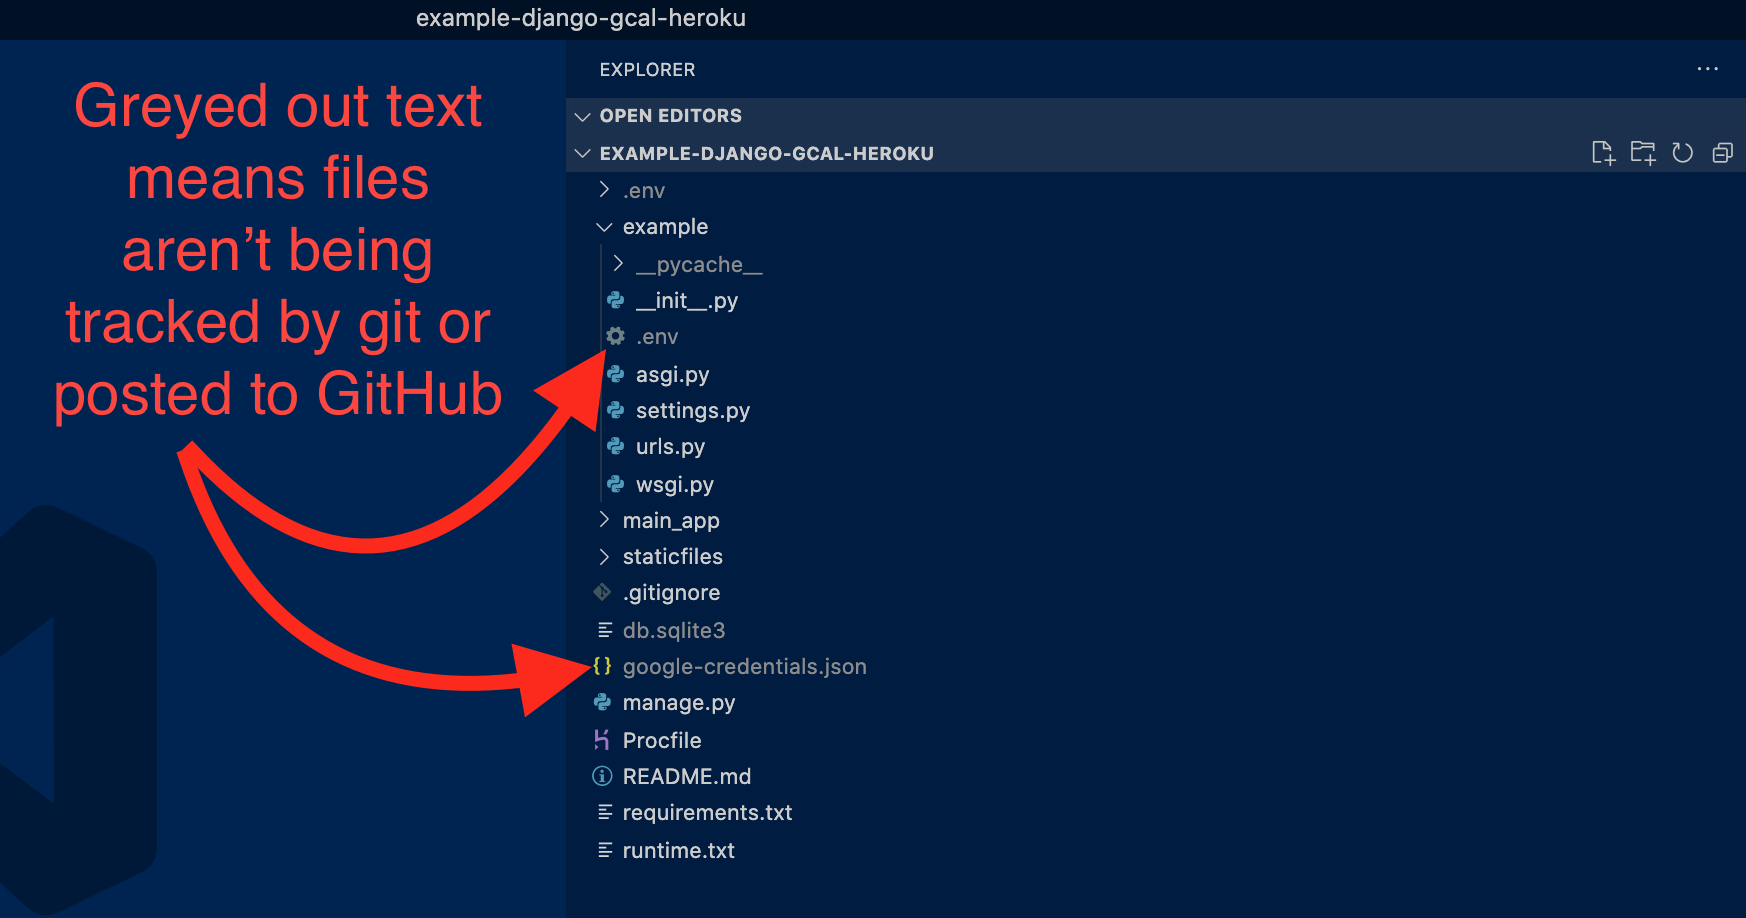
}Update Your .gitignore
- in VSCode open your
.gitignorefile - Ensure all of the following lines are present, which will prevent git from indexing sensitive information (and later distributing it publicly on your GitHub)
# this hidden folder contains your local, virtual environment
.env

# this hidden file contains sensitive keys and environmental config vars
# if you've named your primary project folder something other than
# 'example' please adjust the following line as needed
example/.env

# this token contains your sensitive google service account info
google-credentials.json
Important!
Please ensure both example/.env and the newly created google-credentials.json appear greyed out in VSCode
Add The API Calls
- Open
calendar_API.py, and replace the existing code with everything in the following block (basically replacing our test logging function with the real API calls)
from decouple import config
from google.oauth2 import service_account
import googleapiclient.discovery
import datetime

CAL_ID = config('CAL_ID')
SCOPES = ['https://www.googleapis.com/auth/calendar']
SERVICE_ACCOUNT_FILE = './google-credentials.json'


def test_calendar():
    print("RUNNING TEST_CALENDAR()")

    credentials = service_account.Credentials.from_service_account_file(SERVICE_ACCOUNT_FILE, scopes=SCOPES)
    service = googleapiclient.discovery.build('calendar', 'v3', credentials=credentials)

    # CREATE A NEW EVENT
    new_event = {
    'summary': "Ben Hammond Tech's Super Awesome Event",
    'location': 'Denver, CO USA',
    'description': 'https://benhammond.tech',
    'start': {
        'date': f"{datetime.date.today()}",
        'timeZone': 'America/New_York',
    },
    'end': {
        'date': f"{datetime.date.today() + datetime.timedelta(days=3)}",
        'timeZone': 'America/New_York',
    },
    }
    service.events().insert(calendarId=CAL_ID, body=new_event).execute()
    print('Event created')

 # GET ALL EXISTING EVENTS
    events_result = service.events().list(calendarId=CAL_ID, maxResults=2500).execute()
    events = events_result.get('items', [])

    # LOG THEM ALL OUT IN DEV TOOLS CONSOLE
    for e in events:
        print(e)

    return events
Test It, Again!
At this point, running the local server (make sure you’re in your activated env):
python3 manage.py run serverand viewing localhost:8000 in browser should display the same button as before. However, now clicking the button should trigger the series of API calls we added above:- Create a new test event on your test calendar
- Download ALL events from that calendar (there’s probably only the one unless you manually added any on the Google Calendar site)
- Display those downloaded events both as console logs and render them onto the HTML page under the “DEMO” heading
If that’s all working locally, the next big step is adjusting everything so that it works in production on Heroku.
Connecting the Deployed App
These steps come mainly from this excellent DevDojo.com blog post
Add Custom Buildpack
- In your browser, head to Heroku and log in
- Open up the existing App that you’ve deployed (perhaps you followed my previous blog post: Deploying Django to Heroku?
- Choose “Settings” from the nav bar
- Scroll down and click the “Add Buildpack” button (there should already be “heroku/python” listed as installed
- Paste
https://github.com/buyersight/heroku-google-application-credentials-buildpackinto the text input box labeled “Enter Buildpack URL” - Click “Save changes”
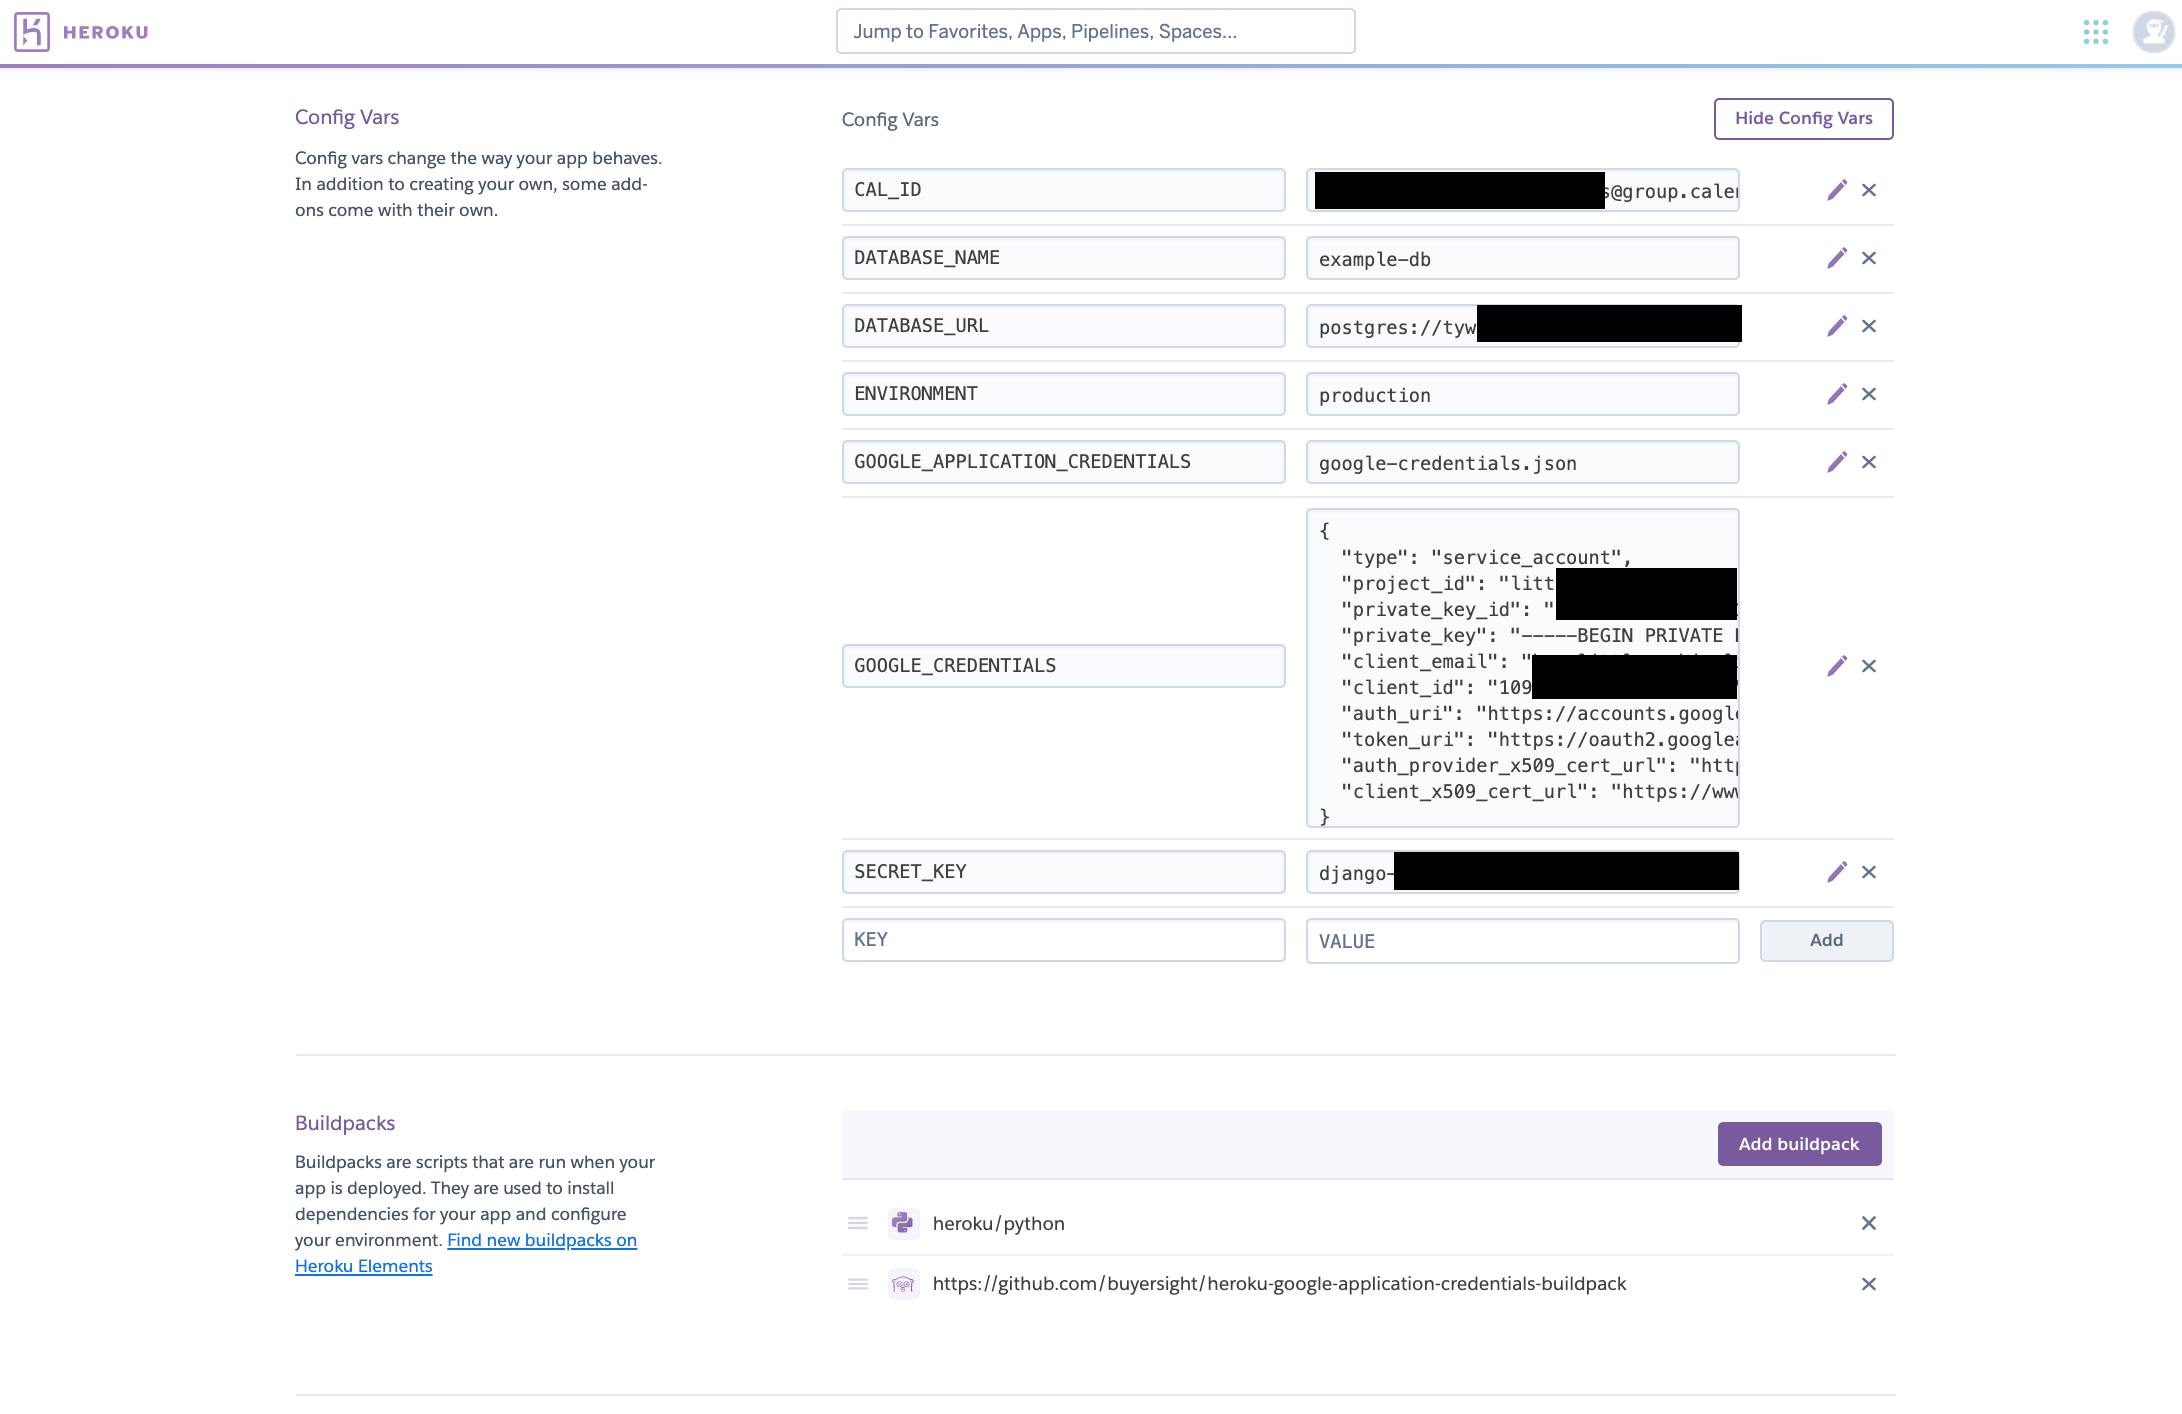
Add Heroku Config Vars
- Scroll up just a bit and click the “Reveal Config Vars” buttons
- You will now be adding all of the keys and corresponding values from your local
.envfile, along with some addition Heroku only entries. - In the KEY box, paste
CAL_ID, and in the corresponding VALUE box, paste the string that occurs after the=in your local .env. In my case it looks like thisfF43grgewefwFWeww1231233r23rwq@group.calendar.google.com. Make sure there are no quotation marks or spaces before and after the string - Click “Add”
- In the new blank KEY box, paste
GOOGLE_APPLICATION_CREDENTIALS, and in the corresponding VALUE box pastegoogle-credentials.json - Click the “Add” button
- In the new KEY box, paste
GOOGLE_CREDENTIALS, and in the corresponding VALUE box, paste the entire JSON object. You can literally copy all of the code that is now in your localgoogle-credentials.json, starting with a{and ending with a} - Click the “Add” button
Deploy to Heroku
- Head back into your terminal, and save your progress in your local git:
git add .git commit -m "getting ready for deploy"- Optionally push to your GitHub if you have added a remote repo
- Deploy using
git push heroku main(ormasterif you haven’t yet switched your local git to default to themainbranch)
Confirm Credentials Were Created
Once you’re notified the deploy was successful, you can use the terminal to manually explore your project’s Heroku server and confirm that the credentials file was created automagically by the build pack and those config vars.
heroku run bash(wait a few seconds for it to log in)ls- You should see
google-credentials.jsonlisted on the floor of your project. Yay! exitwill bring you back onto your local machine
Run It!
Head to your deployed Heroku site, and see if the button still works to populate / print out the Google Calendar events. If so, great job! If not, scope the last paragraph here for some potential debugging tricks.
As noted in the previous article Deploying Django to Heroku, it can be helpful to configure your Django project and Heroku to give more detailed error logging. Check out the instructions on this stackoverflow where they explain adding
DEBUG_PROPAGATE_EXCEPTIONS = Trueand aLOGGING = { ... }library to theirsettings.py
Sundial Photo by Marian Kroell on Unsplash