Deploying Django to Heroku
Deploying Django to Heroku
This post was written back in the days where Heroku provided free hosting; do not expect any example projects or links to Heroku to work.
In the previous Django - Getting Started post, we set up a new Django app, basically creating a fullstack Python Hello World.
In this post, we will deploy this very basic app to Heroku (a free hosting platform which can run a Django server along with other types of web services). There are many ways to deploy Django, but not a single tutorial I’ve found online actually worked for me as written. Therefor, I’ve collected the process that finally did the trick and have outlined it below. A lot of the process comes from our bootcamp instructors, with some customization found several layers deep on Stack Overflow and Reddit (and eventually some personal manipulation). Please let me know if this works for you, and comment below if you have any questions!
Deploy Process
Get Ready
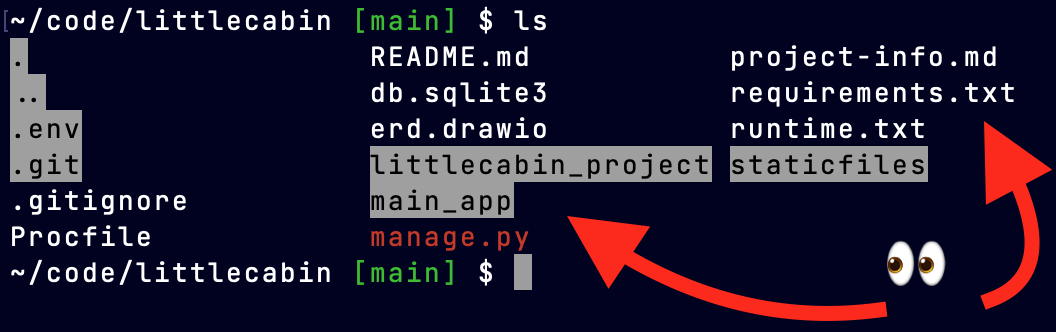
- Load up your terminal and
cdinto the floor of your Django project. Running the commandlsshould yourrequirements.txt,manage.py,main_appfolder, andexample_project, amongst several others. My example is below (some of these files will be created in the following steps)
Log In With Heroku CLI
You will need to have a Heroku account for this process. It used to be free to sign up, and you should also install the CLI (command line interface) from Heroku to complete the following steps:
heroku loginand press any key to launch a browser window which will allow you to sign in to Heroku
Procfile
This file will tell Heroku what actions to take when it receives a web request:
- create a blank file with no file extension:
touch Procfile
ensure the capitalization is exact on Procfile; if you accidentally mixed the casing up you can fix it using this method I wrote about
- open the new
Procfilein VSCode, and add this line. If you followed along with part one the project is calledexample. There should be 3 folders inside your local directory, a.env, amain_app/that was created most recently that contains your home route/view and aexample/that was created initially and contains a route to your admin, and asettings.py. You want the last one of these.
web: gunicorn example.wsgiRuntime
This file simply tells Heroku which exact version of Python to use:
python3 --versiondisplays your current version of Python locally- copy that exact series of numbers; mine is 3.9.2
touch runtime.txtand open it in VSCode- type
python-and then paste (no space in between) the exact version. Mine ends up as python-3.9.2
More Packages
Why re-invent the wheel? Someone already got all this cool stuff working; use it!
pip3 install django-on-herokupip3 install gunicornpip3 install whitenoise- open settings.py
- add
import django_on_herokunear the top of your file under your other import statements - scroll the very bottom of settings.py
- add
django_on_heroku.settings(locals())
Update Dependencies
pip3 freeze > requirements.txt
Deploy
heroku create example --buildpack heroku/python
This will try and create a Heroku project with the URL example.herokuapp.com. If someone has already taken your preferred name you can change to anything else that you want
heroku addons:create heroku-postgresql:hobby-dev- adds a free postgreSQL database to your free Heroku account
Set Heroku Config Vars
In the previous post, we set our app’s local config vars in an .env file and read them out dynamically. Please ensure your app is set up properly to use the following commands and allow Heroku to store its own config vars
heroku config:set DISABLE_COLLECTSTATIC=1- prevents one problem, seems to cause some othersheroku config:set DATABASE_NAME=example-dbheroku config:set ENVIRONMENT=productionheroku config:set SECRET_KEY=whatever_your_secret_key_is
Push to Production
git add .git commit -m "fingers crossed"git push heroku main- this will push your app up to the newly created Heroku project, rather than pushing to GitHub or some other remote as you normally would with git push origin main
If you are still using
masterbranch instead ofmain, you’ll want to swap that word, and it must be from one of those two named branches that you initiate the push
Fix Deployed Database
Now, you’ll tunnel in to the Heroku server with your command line, so you can see what’s going on in there and make needed updates to the free database they gave you.
heroku run bash- once inside, run
python3 manage.py makemigrations. As before, there might not be any changes after this step python3 manage.py migrate- this brings your database up to date with the built-in user models that Django providesexitgets you out of Heroku and back on to your local machine
See If It Works!
heroku openwill launch the site in a browser.
If you have problems, typing
heroku logs --tailwill let your terminal log all sorts of difficult to decipher messages, including some that will help you figure out what’s wrong. To exit this logging feature, useCTRL+C.
To view even more helpful errors, follow the instructions on this stackoverflow where they explain adding
DEBUG_PROPAGATE_EXCEPTIONS = Trueand aLOGGING = { ... }library to theirsettings.py. And as Deepak Raj mentioned in the comments, you may also need to runpython manage.py collectstatic(orpython3 manage.py collectstatic) in your terminal with your project’s virtual environment activated before git committing and redeploying. This fixes some of Django’s issues finding static files.
Photo by Rodion Kutsaev on Unsplash